Online Selection & Acquisitions
When using Online Selection & Acquisitions (OSA), if the Share Lists permission (Selection Lists permission group) is assigned, the user can share their lists with other users. This setting allows other users to view the list, and to add holdings for items on the list. The list must have a Status of Constructing to be shared. Sharing of any list can be enabled or disabled for each review level in your library system's purchasing hierarchy.
To allow other users to add items to a shared list, that user must have the Add to Shared List in Own Library and/or Add to Shared List in Any Library permission (Selection List permission group) selected. See User Management for instructions on setting permissions.
View Shared Lists
After you log in to OSA, click the Shared Lists link on the OSA toolbar located under the OSA Search toolbar.
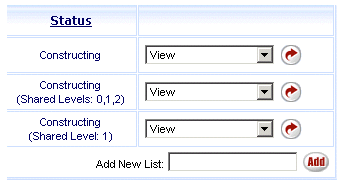
When a list is shared, Shared Level n,n displays under the Constructing status (where n = the level(s) the list is shared with).

Viewing Local Information on a Shared List
Two Selection List security group permissions affect the display and control of local information:
Shared List Administrator - Gives the administrative user power to control many operations that can be performed on a shared selection list and to see and edit all libraries and other information within it. Only Shared List Administrators can edit the title level information for items in a shared list.
Show All Libraries in Shared Lists - Allows a user to see information pertaining to ALL libraries in a shared list, including distribution information (and to edit the information if that user has the appropriate edit permissions). Users without this permission will only see information pertaining to their own library. Unit counts, price totals, and distribution information will reflect only that one library.
Share a List
Click the My Lists link.
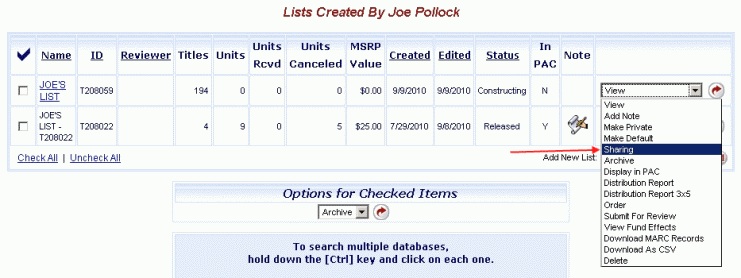
The Lists Created By (Username) screen displays any lists created by the currently logged on User Name that have not been archived.

For the list that you want to share, click the drop-down list to the right and select Sharing, as shown above. Then click the red rotating arrow button.
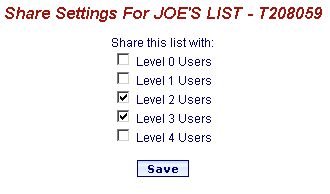
The Share Settings for List Name dialog displays. Select the check box to the left of each level you want to share this list. Click Save. A confirmation message indicates which levels are shared or unshared. Click OK.

The screen refreshes and the Status column displays (Shared Level: n) or (Shared Levels: n,n) below the Constructing status, as shown in the partial screen example below.

Return to Step 3 to share additional lists, as necessary.
UNSHARE a List
A Shared list can be unshared by following the steps above to Share a List, and then de-selecting the level(s) you want to "unshare." Click the rotating red arrow button. The confirmation message displays which levels are still sharing the list, if any. If all levels are de-selected, the confirmation dialog advises, The list name is no longer shared. Click OK.
Return to: List Management Overview