Online Selection & Acquisitions
These instructions will permit you to add, update, copy, or delete a Z39.50 Database configured for use with your Online Selection & Acquisitions.
Required Information
Most of the information required to complete the Z39.50 Database Configuration form should have been given provided to you by the database vendor.
Z39.50 Database Configuration Fields
|
Field Name |
Description |
|
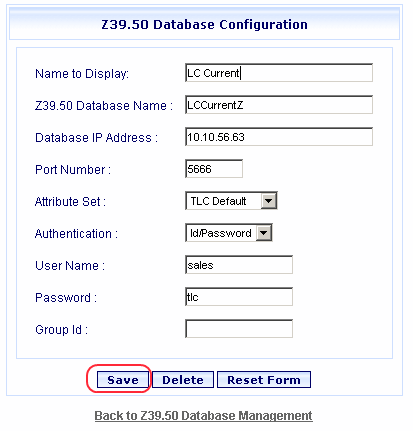
Name to Display |
The name of the database you want to display on the list of databases in the Look in section of the Search dialogs. |
|
Z39.50 Database Name |
The proper name of the database referred by the database provider. |
|
Database IP Address |
The Internet Protocol (IP) address of the database. |
|
Port Number |
The port number used for communication with the database. |
|
Attribute Set |
The database vendor provides a related profile. You can use the TLC Default, or create your own. See Z39.50 Attribute Sets for more information. |
|
Authentication |
Select the method of authentication you want to require when the database is accessed. Options are: Id/Password, Open, Anonymous, and None. |
|
Username |
Type the Username required to access the database. |
|
Password |
Type the Password required to access the database. |
|
Group ID |
Type the Group ID the account is associated with. |
These databases provide search gateways to Z39.50 resources, like the Library of Congress, OCLC, RLIN, or any other Z39.50 resource to which the library has access.
Log in to OSA with a Username with permissions to perform this function.
Click the Admin link and the Administration menu displays.
In the Search Preferences section, click Z39.50 Database Management. The Z39.50 Database Management dialog opens.
See the following sections to learn how to add, update, copy, or delete Z39.50 Database Configurations.
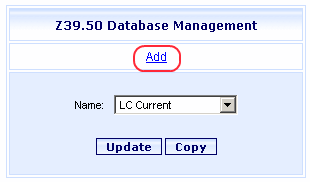
Add a new Z39.50 Database
Click the Add link, as shown below.
A blank Z39.50 Database Configuration screen opens, as shown below.
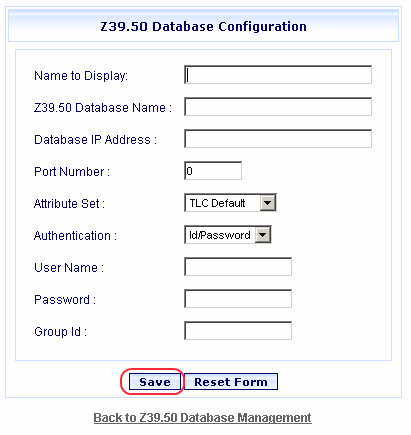
Complete the information. See the Z39.50 Database Configuration Fields table at the beginning of this topic for information about each field. Most of this information is provided by the database vendor.
Click Save to retain your information. A notice advises the new database was saved. Click OK.
Copy an Existing Z39.50 Database Configuration
Select the desired database name from the Name drop-down list and click the Copy button, as shown below.

The current configuration settings for the selected Name displays. The Name to Display field is empty.
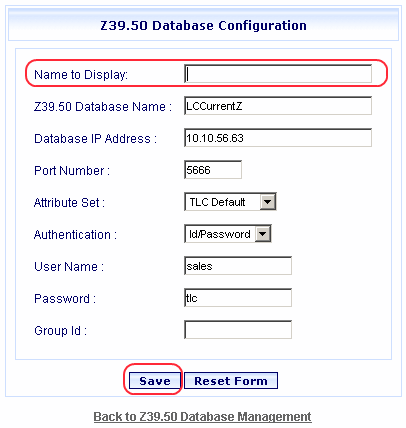
Under Name to Display type a name for the copied configuration and make changes to any other fields.
Click Save to retain your information. A notice advises the updated database was saved. Click OK.
Update an Existing Z39.50 Database Configuration
Select the desired database name from the Name drop down list and click Update.
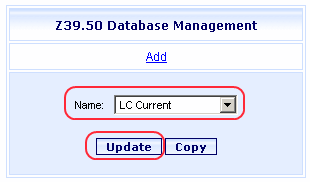
The current configuration settings for the selected Name displays. Revise the settings, if necessary.
Click Save to retain your information. A notice advises the updated database was saved. Click OK.
Log in to OSA with a Username with permissions to perform this function.
Click the Admin link and the Administration menu appears.
In the Search Preferences section, click Z39.50 Database Management. The Z39.50 Database Management dialog opens.
Select a database name from the drop-down list to the right of Name, and then click Update.
The Z39.50 Database Configuration screen displays. Verify this is the Z39.50 Database Configuration you want to delete, and then click Delete.
You need to confirm you want to delete this database from the system. Click OK. A notice advises the database was deleted.