Online Selection & Acquisitions
See also: View or Edit a List
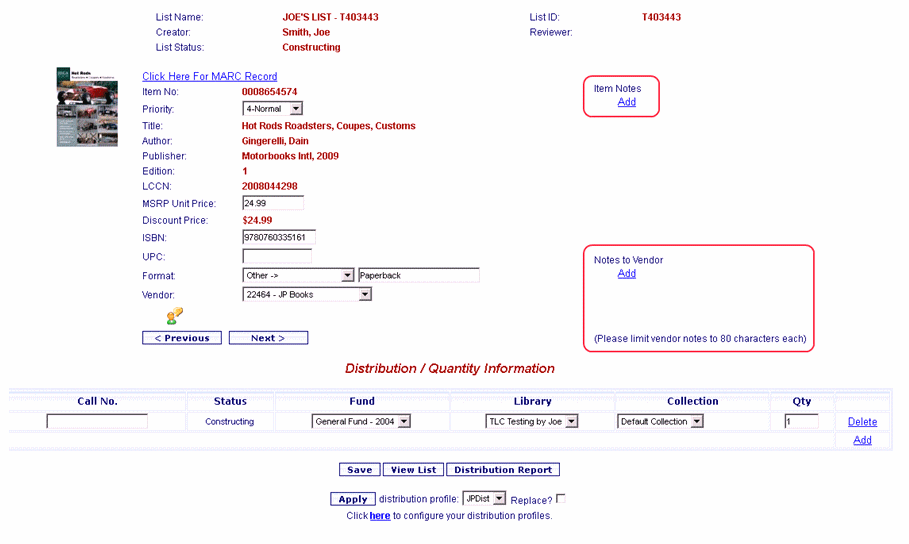
In Online Selection & Acquisitions (OSA), when viewing the Item Edit screen there are two options to add notes; Item Notes and Notes to Vendor, as shown in example in the To Add an Item Note or a Note To Vendor section below. To allow you to know if a note has been added to an item the List Details screen displays a Notes column indicating (Y or N) whether a note has been added to an item.
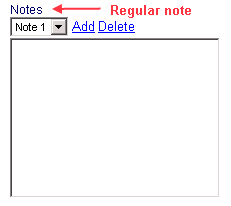
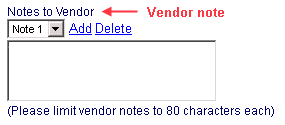
Multiple Item Notes and Notes to Vendor can be added. On the Item Edit screen, when multiple notes have been added of either type, only one note is visible at a time. If more than one note has been added, use the drop-down list to select and view the other note(s) as shown on the example in Step 2 of the Adding Either Type of Note to An Item section below.
Item Notes are limited to 4000 characters. Each Note to Vendor is limited to 80 characters due to an EDI length limitation for electronic purchase orders.
New and existing Item Notes will NOT be included on any type of purchase order.
You can add an Item Note to multiple items on a list from the List Details page. See the Adding an Item Note to Multiple Items section at the end of this topic.
About Notes to Vendor
Before Using Notes to Vendor
Notes entered using the Notes to Vendor field will display on purchase orders whether the EDI Ordering Protocol on the EDI tab of the Vendor Configuration screen (Admin / Vendors) is set to Paper, Email, or X12.
For vendors configured for the X12 protocol:
In the X12 Purchase Order Settings (Admin | Vendors) the Send Vendor Notes check box must be selected or the Notes to Vendor field will not display on the Item Edit screen.
The notes data is transmitted in the PID segment.
Prior to utilizing the Notes to Vendor feature confirm that your vendor(s) can accept the notes data and the PID segment, and can make use of the note information provided.
Changing Vendor Selection for Items with Notes
On the Item Edit screen, if the item’s Vendor selection is changed to a vendor that does not accept vendor notes (Send Vendor Notes not selected), a popup message will open advising; This vendor is not configured to receive notes via EDI, so the “Notes to Vendor” will be lost upon Save. Click Cancel to retain the current vendor selection. Click OK to continue with the change of vendor. The vendor notes will be removed from view.
Note: If you clicked OK, so long as you have not navigated away from the Item Edit screen you can restore the Notes to Vendor by selecting a vendor configured to accept vendor notes.
On the List Details screen, under Options for Checked Items, if the Set Vendor option is used to change the Vendor selection to a vendor that does not allow vendor notes, a message will display advising; This vendor does not support notes. Existing vendor notes will be deleted. Click Cancel to retain the current vendor selections. Click OK to continue with the change of vendor. The vendor notes will be removed from view.
Add a Regular Note or a Note To Vendor
Use the steps after the example below to add either type of note while viewing the Item Edit screen. The Item Edit screen, is accessed by locating the item on the List Detail screen and clicking the Edit link to the far right.
Adding Either Type of Note to An Item
Under the appropriate heading (Item Notes or Notes to Vendor) click the Add link as shown in the partial screen example above.
The appropriate dialog box will display, as shown in the partial screen examples below, with Note1 displayed in the drop-down box.
Type the note as desired.
If it is necessary to add another note, click the Add link. Note2 will display in the drop-down box and the text box will clear to accept the second note.
Type the note as desired. Repeat as necessary.
When done, click the Save button at the bottom.
You will be advised "Your changes have been saved."
Click View List and notice that the Notes column now indicates Y (a note is present).
Modify, or Delete an Item Note
While viewing a list, locate the desired item and click the Edit button to the far right. The Item Edit screen will open.
If more than one Item Note is included, use the drop-down list to select the note to be modified or deleted. With the desired Note title visible in the drop-down box:
TO MODIFY an Item Note: Click in the Note box and make changes as desired.
TO DELETE an Item Note: Click the Delete link. The Note will be removed.
Repeat these actions (Modify or Delete) as necessary.
When done, click the Save button at the bottom.
A message will display advising; Your changes have been saved.
Adding an Item Note to Multiple Items
OSA also provides the ability to add an Item Note to multiple items at one time.
To Add an Item Note to Multiple Items
On the List Details page select the check box in the first column for each item you want to add the note to, or click Check All to select all items listed, as shown in the partial screen example below.
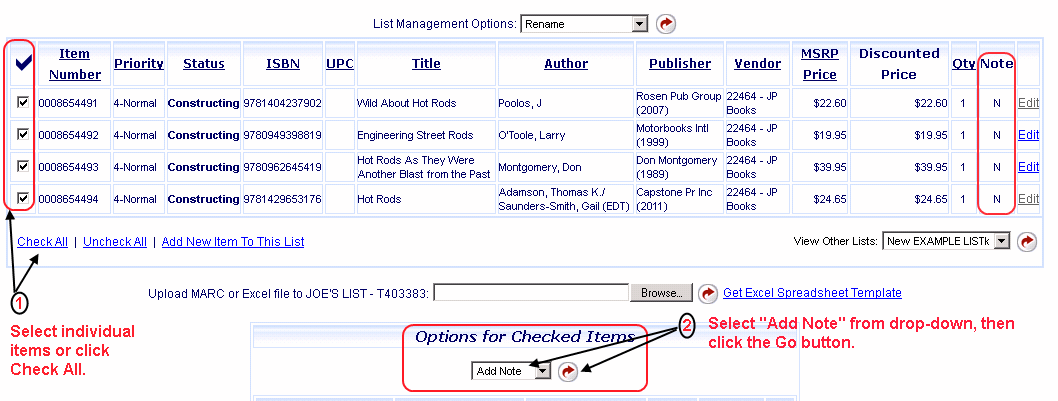
Select Add Note from the Options for Checked Items drop-down list, and then click the Go button as shown in the partial screen example above.
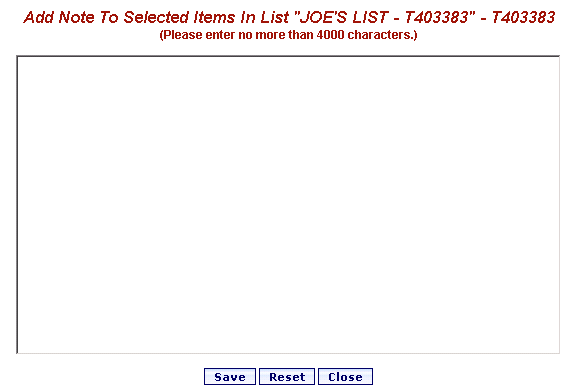
The Add Note to Selected Items in List.... dialog will open as shown in the partial screen example above. Type the note and click Save. A message will display advising; The Note has been added to the items you checked.
Click the Close button to close the dialog. Refresh the List Details page and the Note column will display a Y for each item you added the note to.
Return to: List Management Overview